
At Ferrotall we want to talk about one of the most difficult challenges in 5-axis machining centers; maintaining precision within the working area and how GROB has the solution to guarantee maximum machine precision.
The idea is to maintain the same precision in the entire working area and all possible angles that a 5-axis machining center offers.
For 3-axis machining centres, maintaining accuracy is relatively easier, since the way to correct and improve the accuracy of the machine is to use a laser interferometer to calibrate the machine and thus compensate for the accuracy of the individual axis position and the maintenance measurement to use a calibration system to improve the perpendicularity between axes.
The problem comes when two rotational axes are added (the 4th and 5th axis). In machining with 5-axis centres there may be distortions in the positioning of the machine axes caused by the movement and inertia of the workpiece.
To check and compensate for any distortions, GROB, as a manufacturer of universal 5-axis machining centers, has developed its own method to improve the accuracy of its machines.
The 5-axis kinematic measuring system
The most standardized system is the GSC which works like this: a spindle probe is coupled with a precision sphere mounted on the pallet. A kinematic cycle touches the sphere with the probe and then rotates to reposition the rotary axis. This action is then performed repeatedly. By chasing the sphere around the five axes of the machine, the true centre of rotation is identified.
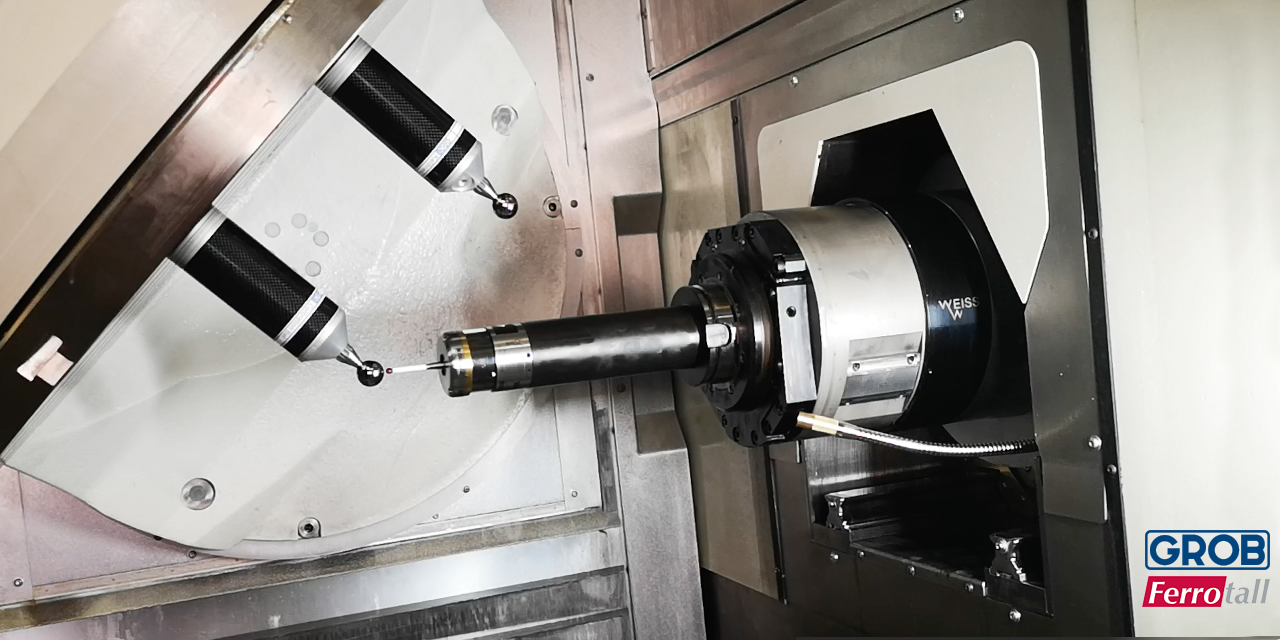
But GROB’s own system (kinematic measuring system) has a differential factor, as the manufacturer takes it beyond the centre of rotation by means of two spheres.
A probe “”chases”” the spheres to map the position accuracy within the entire working area. As the pallet is rotated and rotated, the probe identifies any rotational or transational deviations – from top to bottom in the Y-axis stroke, maximum X to maximum Z, and everything else in between. The measured deviations are sent to the compensation software, which then perfects the positioning accuracy.
With this system, we compensate not only the rotary axes, but also the orthogonality of the linear axes.
GROB’s method improves the accuracy of five-axis machines, especially those called upon to produce complex parts and components for critical applications, ensuring maximum precision.
If you want to know more about GROB Machining Centers


“


